
Form Workflow
Form workflows are ideal for clients that are comfortable around forms, or for clients that you may already have a questionnaire previously completed.
To create a form, follow these steps:
Step 1: Choose your application bundle or individual forms.
Sprintforms supports the majority of Canadian immigration forms. For convenience, many of these forms are pre-bundled together to form an "application bundle". Click on any bundle to reveal their contents:
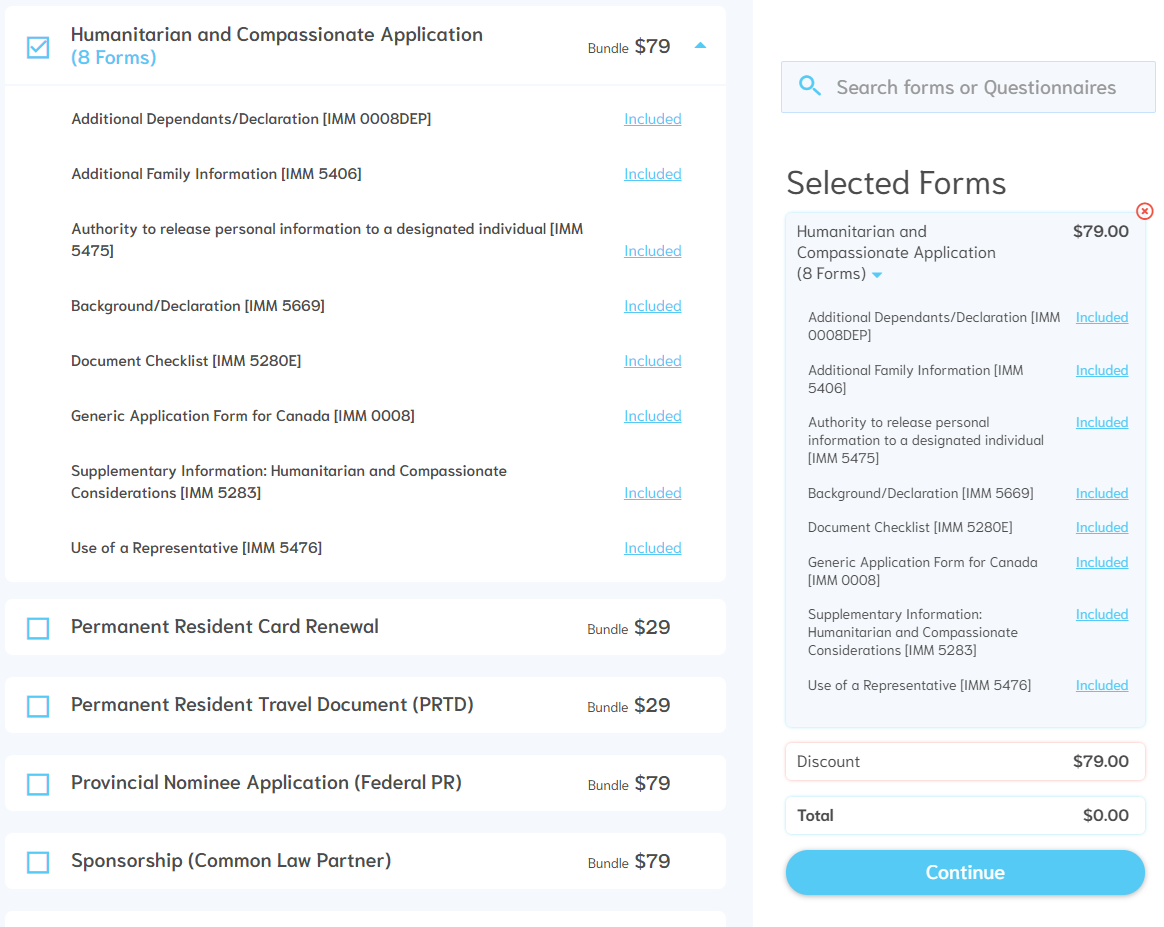
Note: You can click on the "Included" link to exclude a specific form if you don't want it from your bundle.
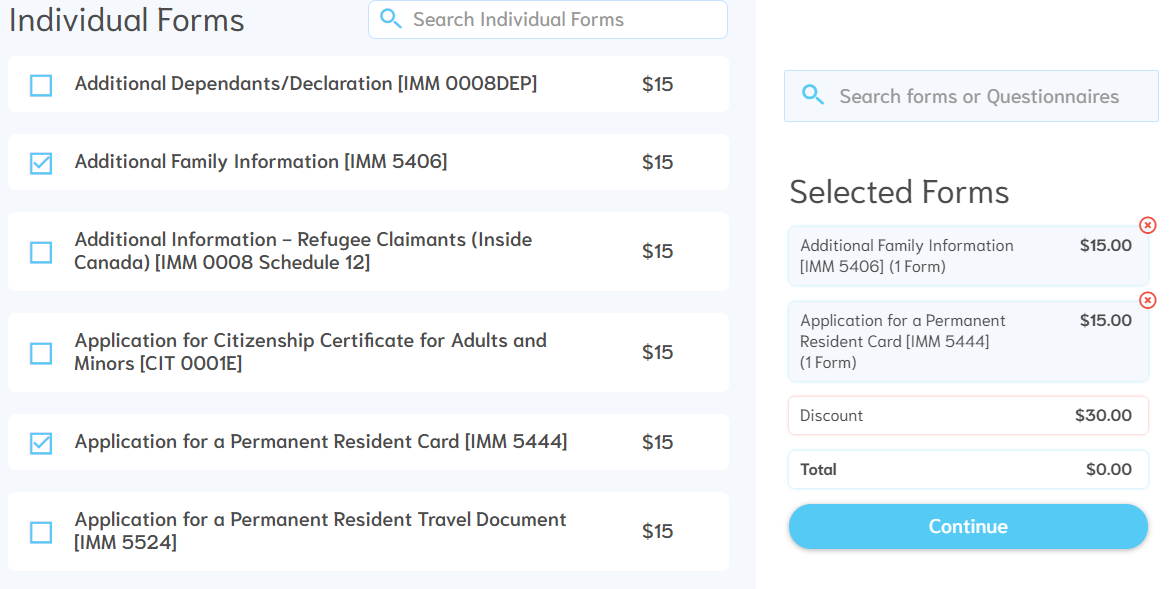
You may also choose individual forms, in situations where you may only require one or two forms. In this example, we've selected only the Family Information Form and the PR Card Renewal Forms:
Step 2: Assign your client, and select form creation options
Now that you've chosen your application bundle or individual forms, assign the client that these forms belong to. You can also select options about these forms, including copying information from pre-filled questionnaires, and/or assigning work to other practitioners.
In the following example, we've assigned the selected forms from the last screen to an existing client named "Bobby Smith", and have chosen to Copy Data from Bobby's previous questionnaire. The assigned practitioner has been left to the account holder:
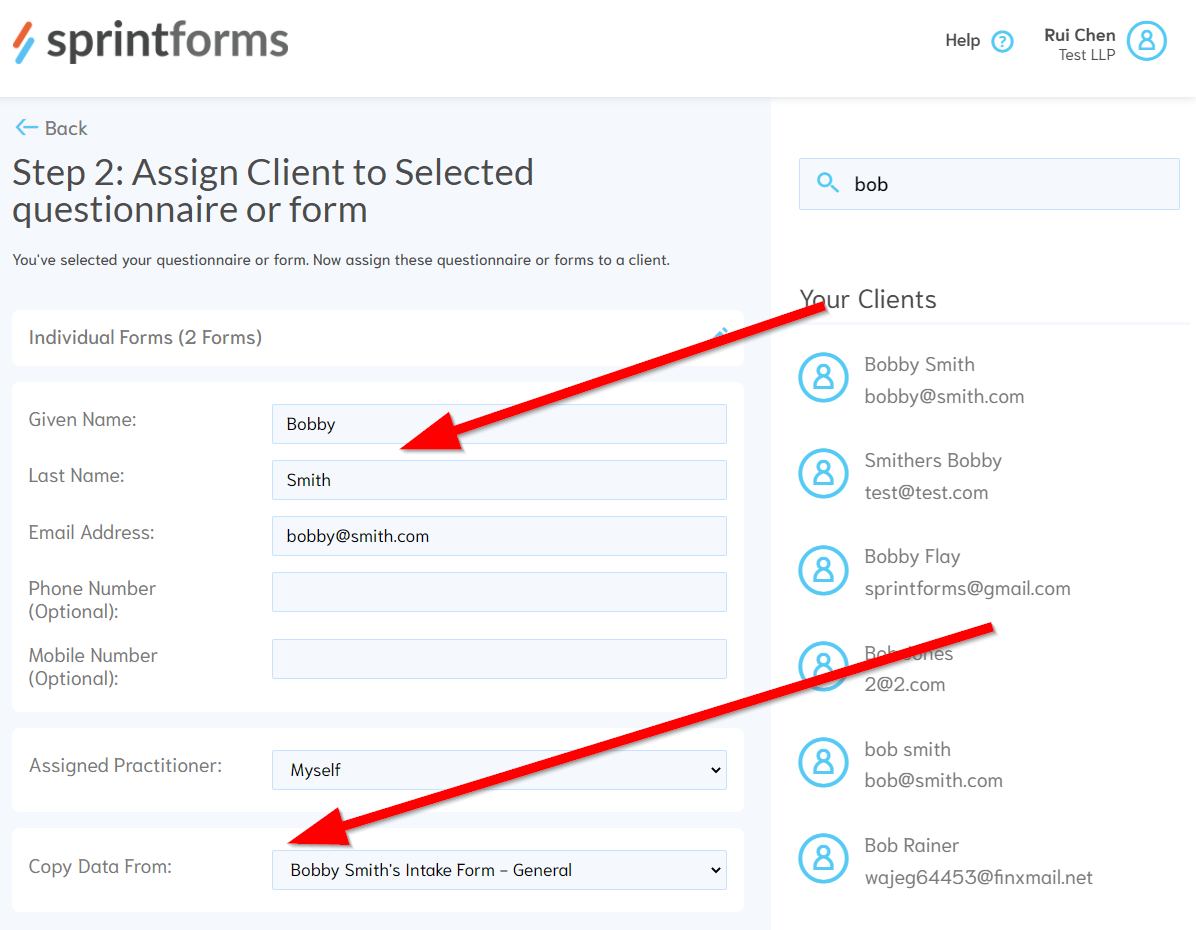
Note: If you don't see the "Copy Data From" selection, make sure you've assigned the forms to a client that has previously completed a questionnaire. Clients who are known to Sprintforms will appear on the right box under - you can click on their names/emails to ensure that you're selecting the right client.
Step 3: Review Your Selection
The last step is to review your selections and your order details. You may be asked to provide payment details on this screen if you do not have a saved credit card and/or are not on a monthly plan.
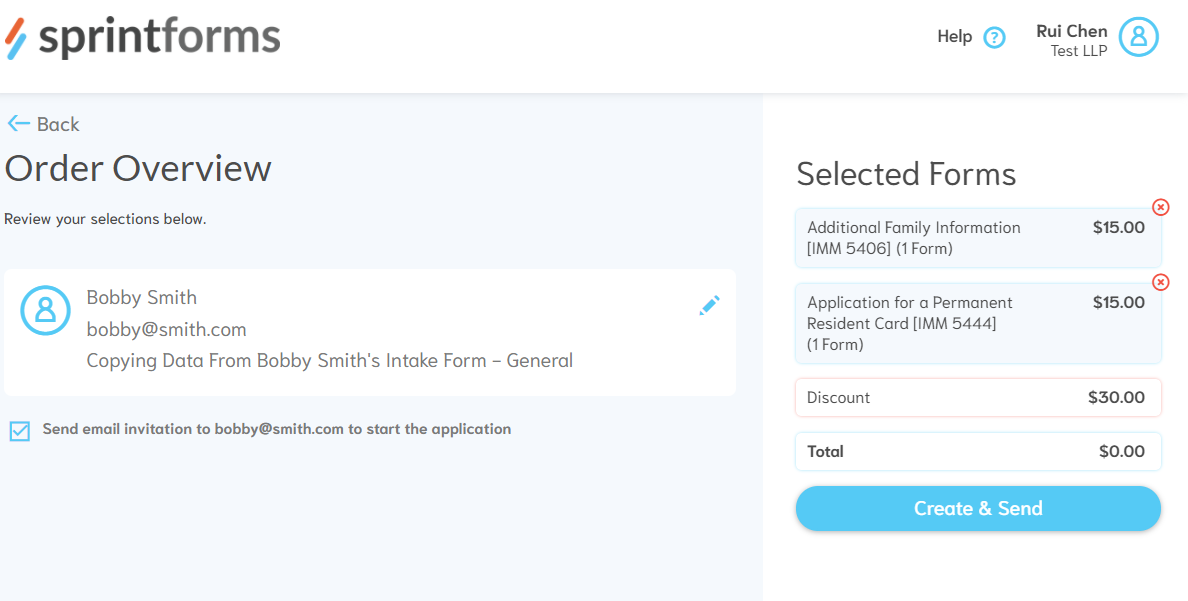
Note: You can also choose not to notify your client of the creation of this form (bundle), if you'd like to edit the application yourself. You can choose to notify them at a later date via the client information screen.
Once you press "Create & Send" your intake form has been successfully created! You can view the intake form right away, or return to the dashboard.
